Tuesday 15 December 2020

A couple of textile pieces by Kate Dec 2020


Looking through the railing at reflections in the River Witham in cut felt


landscape patchwork cushion

Thursday 10 December 2020

Judith's Advent Calendars December 2020

 I saw this idea on Pinterest and thought I could copy it. Never again, it took ages because every step I had to plan it out, with just working from a picture it was difficult to decide on sizes. I was pleased with the result, worth all the hard work.


Advent calendar made from a printed panel. Still very fiddly


Wednesday 2 December 2020

Thomas Garrett Rooms at Heighington closing till end of January

Julie's clips December 2020

 These clips are available from Gill Barszcz - who writes

Wonder clips multicoloured you get a pack of 50 for £6 posted. please message me with order and email for paypal as these are listed in a few places.

If you are not on Facebook, then contact Julie


Thursday 5 November 2020

Judith's Christmas Decoration December 2020

 Instructions


Stage 1 Large heart 
Cut out 3 pieces of fabric using the largest shape
Cut out 3 pieces of interfacing using the slightly smaller heart
Stage 1 Small heart
cut out 3 in fabric and 3 in [the smaller heart] in interfacing.

Stage 2. For each of the three sides of each heart shape. Take a piece fabric and the appropriate piece of interfacing and like you would do patchwork, fold the fabric over the edge of the interfacing, pin and tack it helps if you tack in a contrasting coloured thread, it makes it easier to remove later. Repeat on all 6 heart shapes.[3 large and 3 small]


Stage 3 large heart - Place 2 heart shapes, wrong sides together and oversee halfway round - from the point to centre of heart at the top.


Stage 4  Place third heart between the two you have sewn and oversew the 3rd one in place to just one edge. One half of this heart should be open. [Before you sew the other two edges together you will need to place your fine cord/wool/ thread on which you are going to fasten the two hearts shapes together and place any decoration between the two heart shapes. Remember the joining cord you will need to be able to thread it through beads etc.] The cord/ thread has to placed down the inner centre of the heart, when stitching round the heart you can secure the cord at the top and bottom of heart shape, just so it holds fast and prevents them slipping. Before attaching the small heart place beads and decorations between the two hearts.
The base and top decoration can be added later along with the ribbon to hang up the decoration.


Stage 5  Repeat for the small heart and secure in place under large heart and beads etc.
               Remove all the tacking stitches.

Stage 6  The 2 heart shapes must be completed and in place on the cord and secure before you attach the beading round the edges of the two heart shapes.

Stage 7 Finish off by attaching any beads or bells below the small heart and similarly above the large heart. Secure firmly then attach a piece of ribbon to the top, so you can hang up the decoration.


I hope you enjoy this project.
       

Judith

Wednesday 4 November 2020

Julie's Christmas wreath 2020


Julie writes - this looked lovely but a lot more work involved than I had anticipated.   The idea is quite simple.  I will be putting it on the door for Christmas regardless.

Sunday 1 November 2020

Winter lockdown Nov 2020

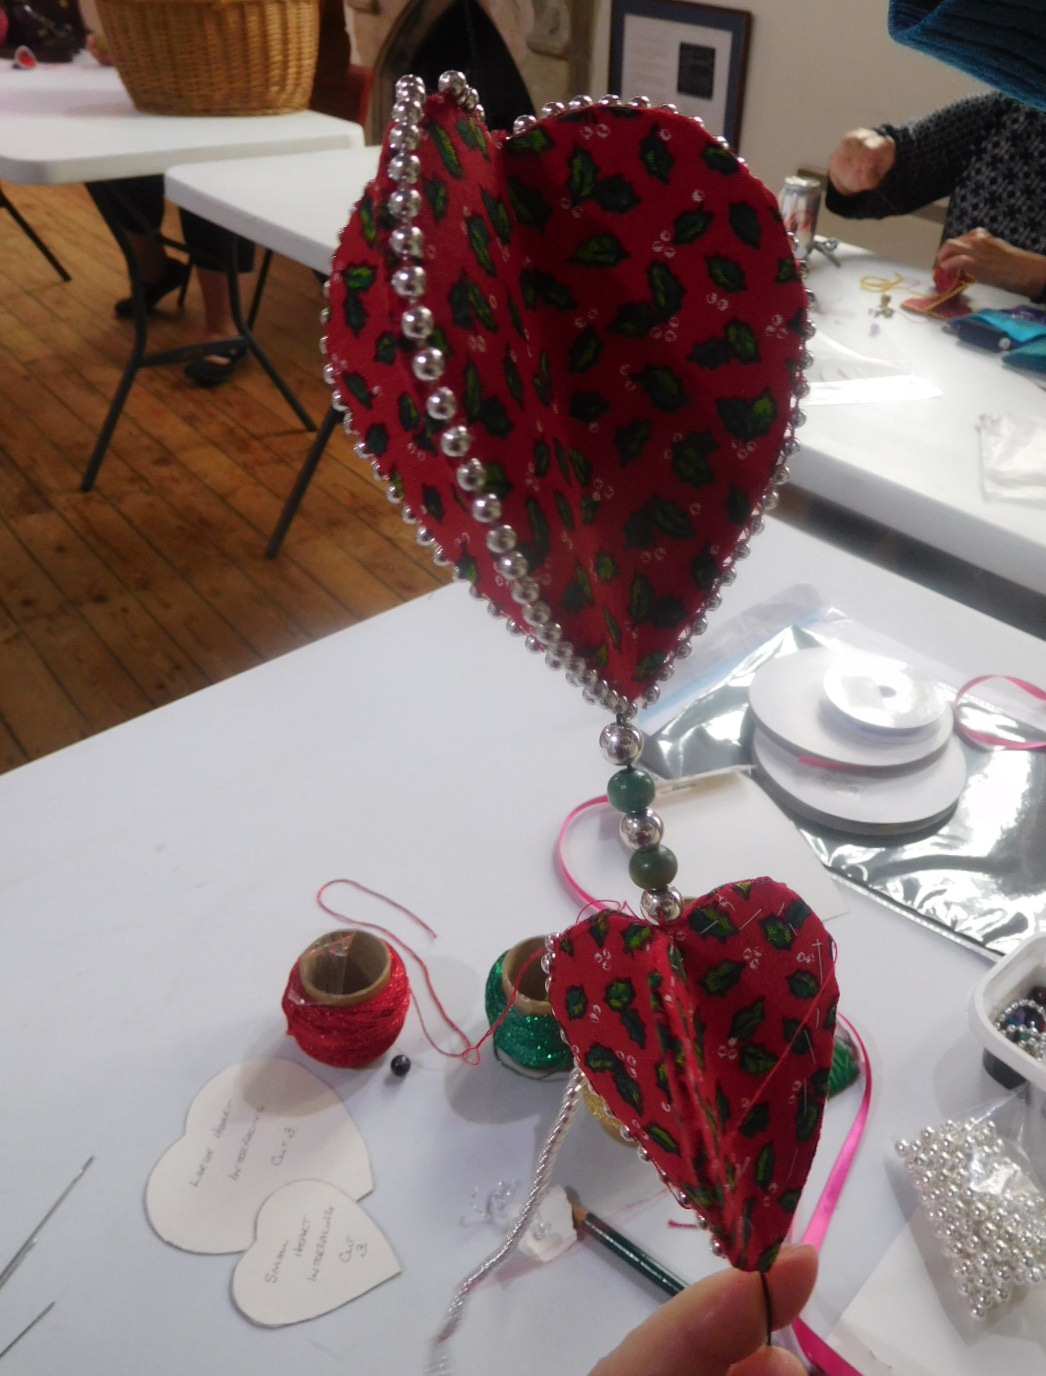
 Sadly we are cancelling the stitch club on 7th November 2020. Judith is putting together instructions for the Christmas Decoration which will be on the blog soon.

I don’t think this will come as a surprise to anyone; not unexpected, but certainly unwanted news.  I’ve been thinking about developing a lockdown piece of my own; don’t know if it will happen, or how it will turn out, but if it does I will send photos for the blog. 

Love, condolences, and Christmas-is-coming, hopeful thoughts to all!  Anne


Hi All
I'm definitely not looking forward to yet another elastic length lockdown. My son, Arth, has suggested we could join up for a craft group using Zoom a webinar meeting. Any thought on this?
Advantages being the tutor-stitcher could demonstrate the new techniques/methods and we could show our progress in real time plus get advice and guidance. We could of course continue are discussions on putting the world to right and let's be honest right now it certainly needs sorting. Vanda

Thanks for the notification- we must bow to the inevitable, I suppose! I shall keep looking for the instructions on the blog, and have a go at home.
I’m still making Japanese patchworks, and am slowly working out how to turn it into a bag. I’ll send you a photo if I succeed!
Stay safe
Bron 

Sunday 25 October 2020

Christmas heart decoration with Judith Snaith, 24th October 2020

 We had a marvellous session with Judith in charge and Julie, Monika, Ann R, Kate and Jacqui enjoying the project.


Friday 23 October 2020

Sheila has been trying new ideas autumn 2020


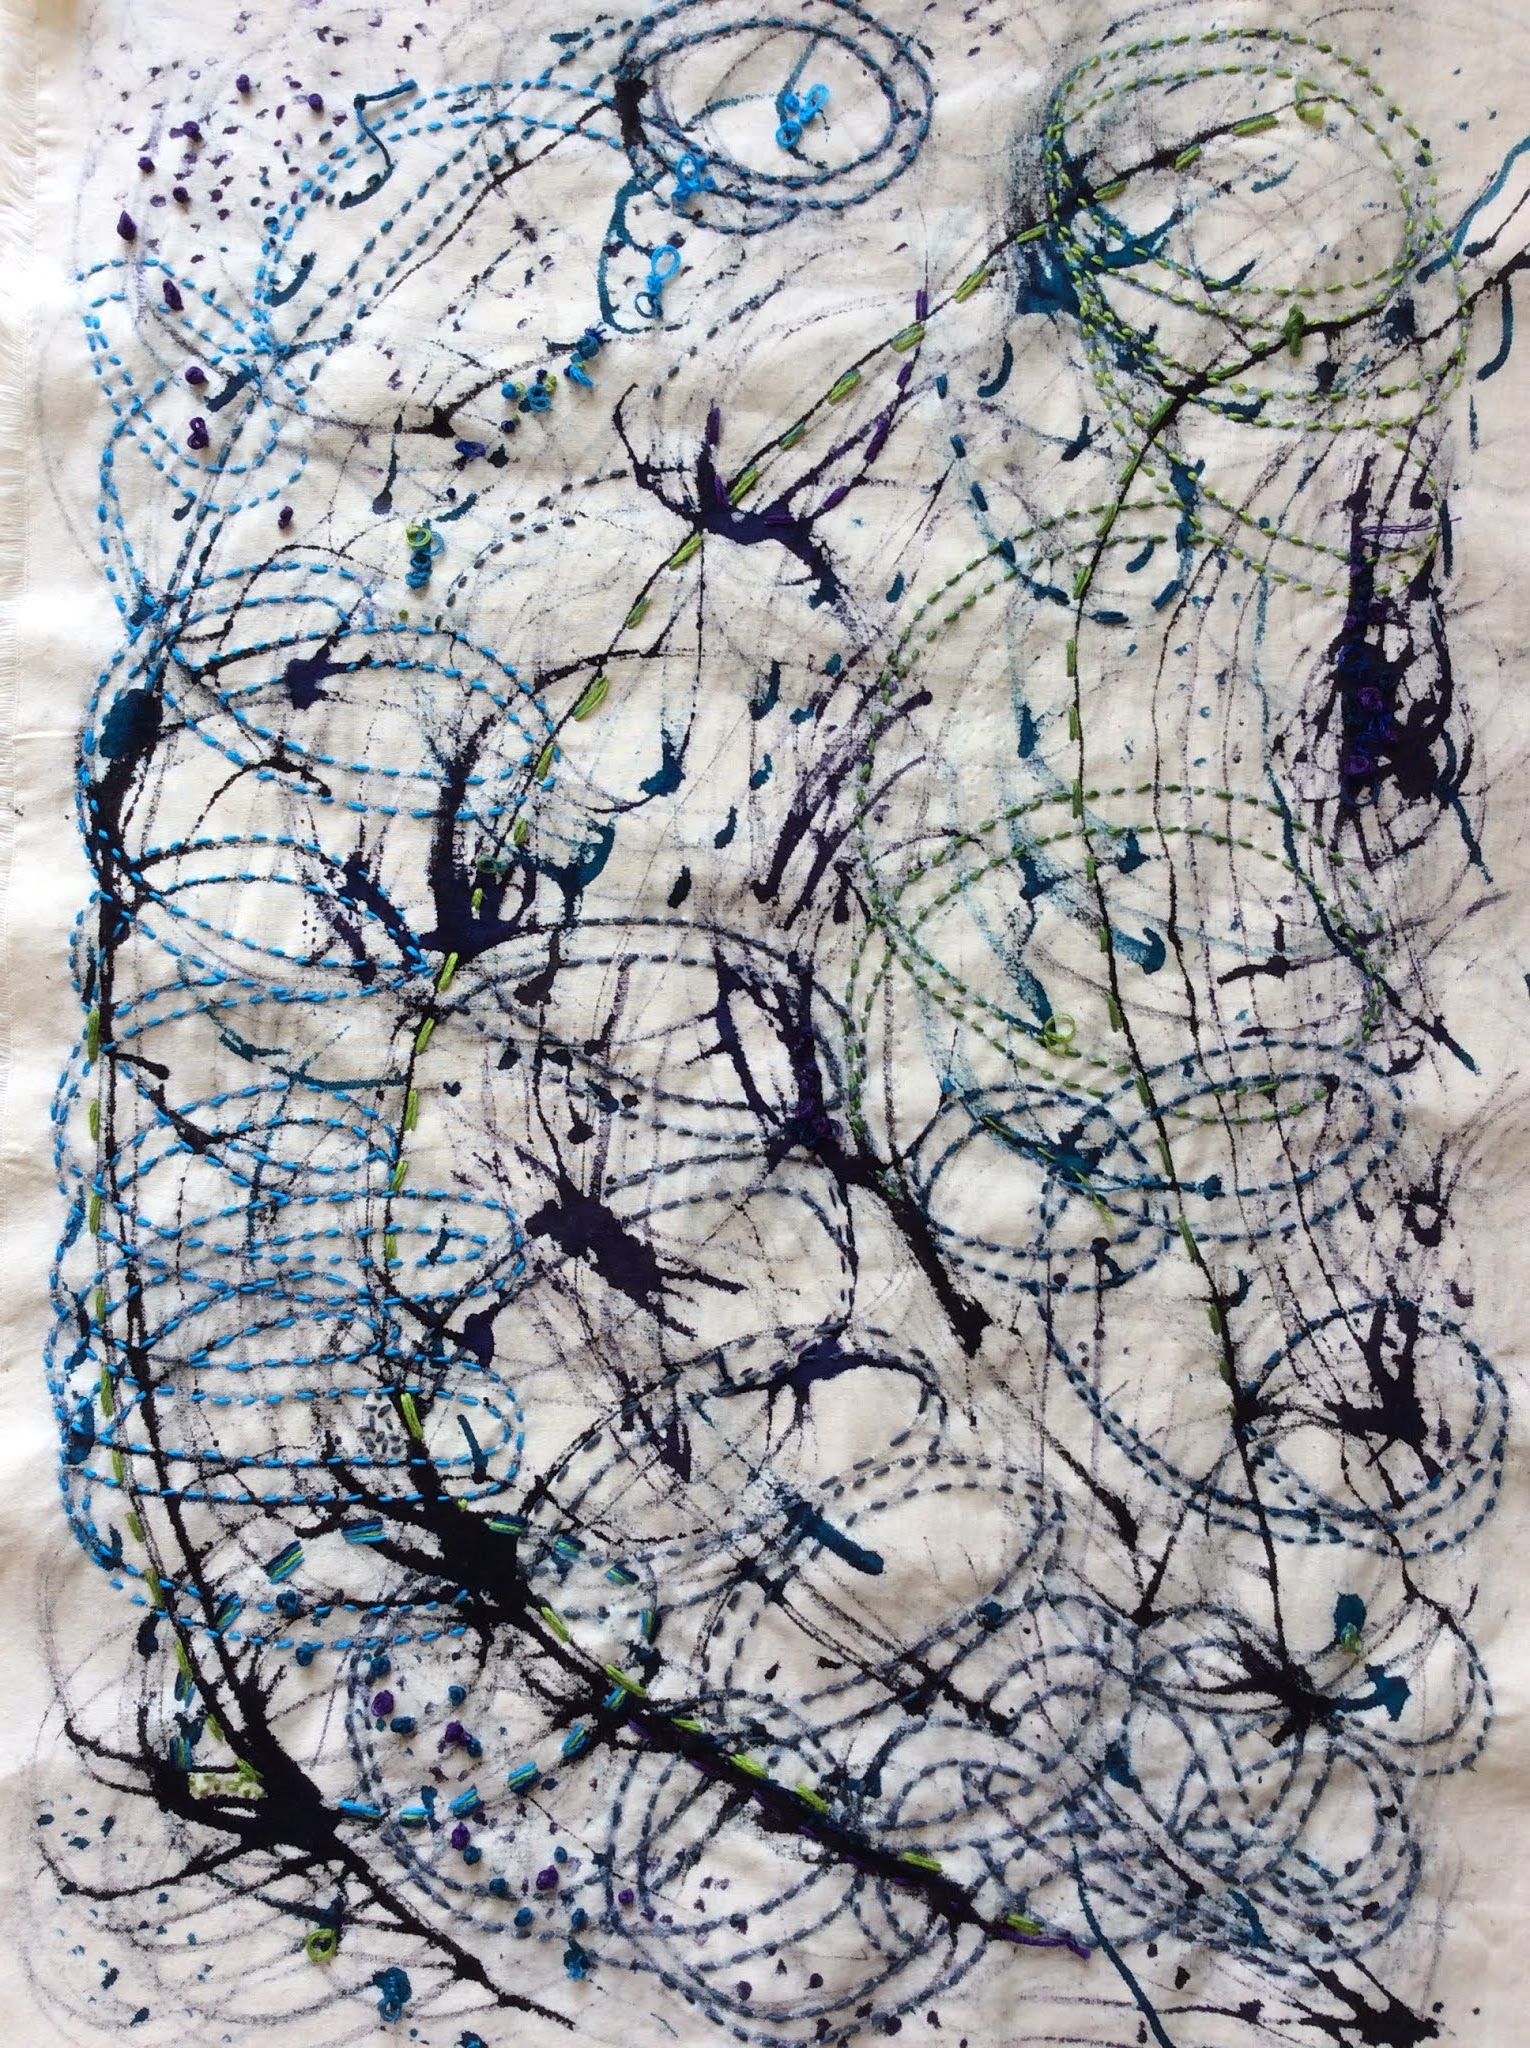
The photo is the whole piece. It’s only A5 size. Just a sample really. The process was to lightly crumple a piece of paper then open it out and take a design from the crease marks. I can see all sorts of possibilities there.

Tuesday 20 October 2020

Kathy Paton and her hand decorated cushion covers - 2020

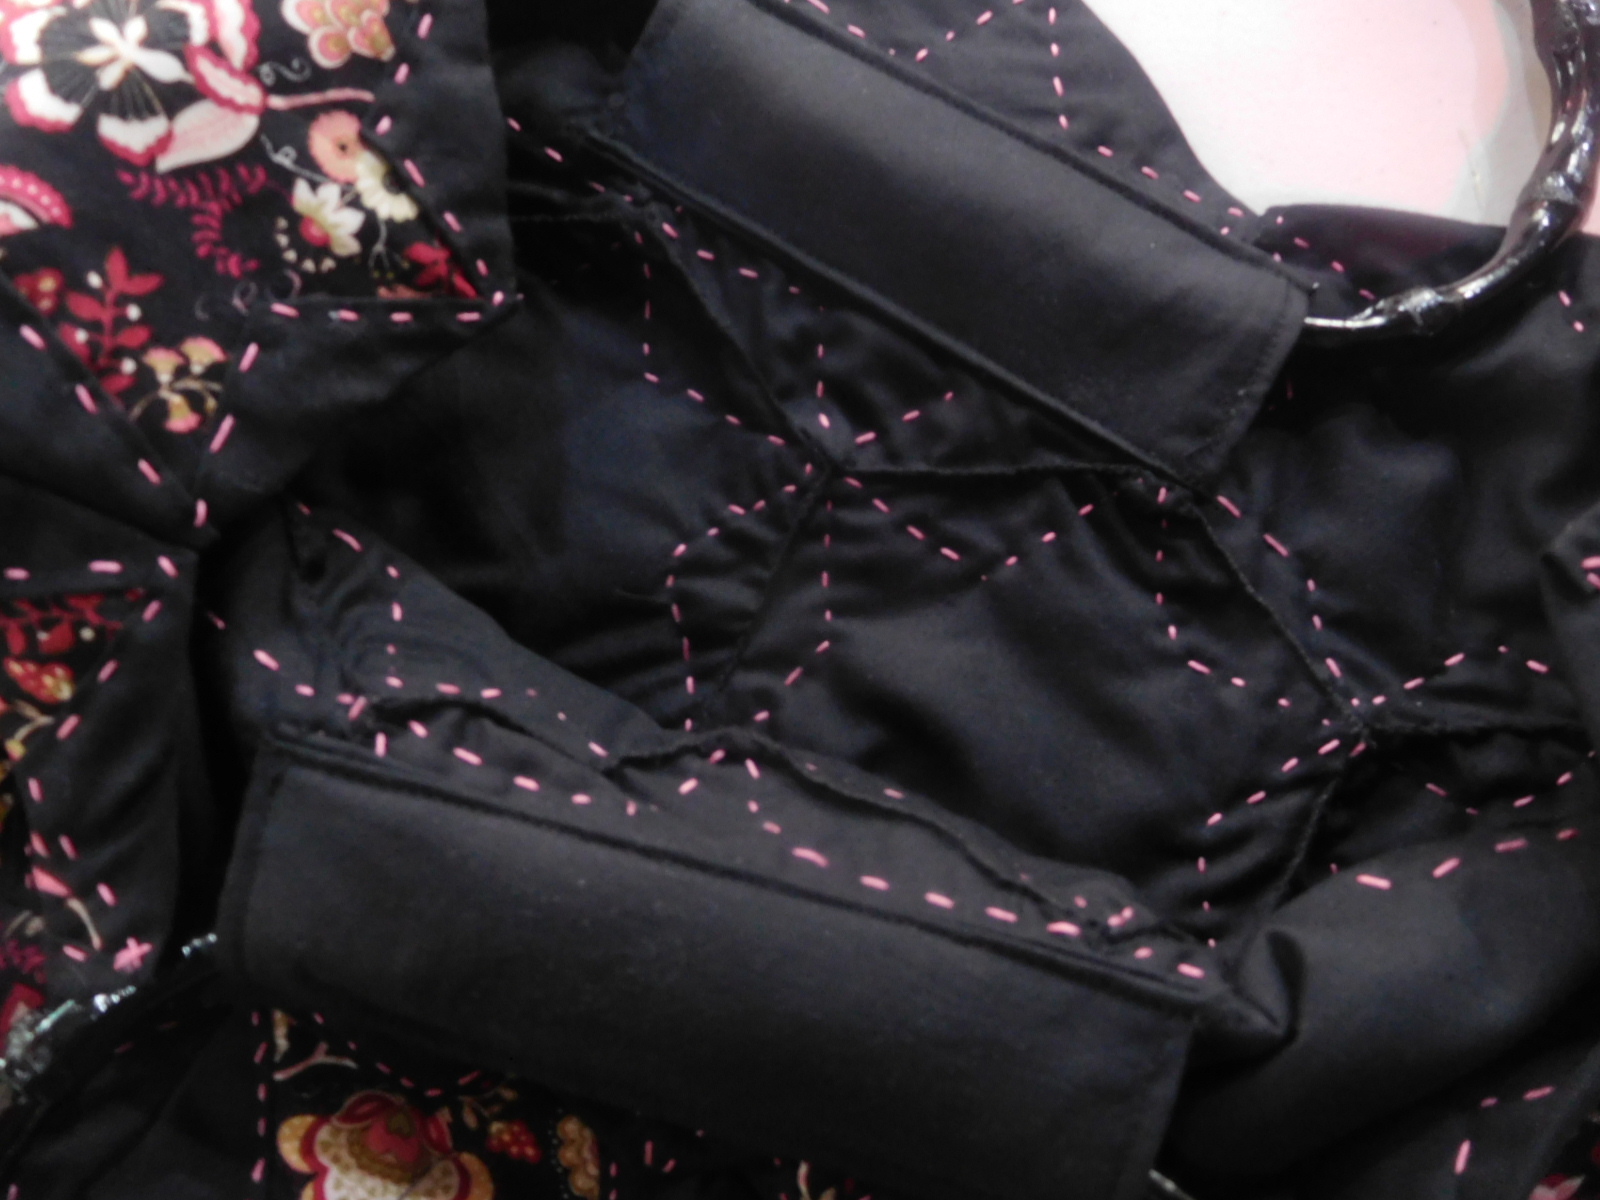
 Kathy was working on her cushion covers on 17th October and she has sent me some photos of them for us all to enjoy


Sunday 18 October 2020

17th October 2020 Japanese patchwork with Kate Steane

 Five of us met at Heighinton - one tutor, two patchwork students and two who worked on their own projects. We worked, we talked and we enjoyed the Saturday.


Bron's many beautiful patches


Jacqui and her lovely stitches


and her humour


Judith's amazing Japanese patchwork bag


with her lovely stitching inside and out


Sunday 27 September 2020

Heart - shaped Christmas decoration with Judith Snaith - 24th October and 7th November

 While the October Japanese patchwork stitch club is booked for Saturday 17th we thought you might like to consider the next project, which Judith will be running before Christmas. She is happy to do two sessions, if there is the demand; so you need to let me know if you are interested. 

The decoration consists of 1 large shaped 3D heart and a smaller one. You can just do a single one.
The requirements for the decoration illustrated are as follows:-

Christmas cotton print fabric with a small design.
Large heart.   - 3 pieces each 12cms x 12cms
Smaller heart - 3 pieces each 8cms x 8 cms

Pelmet or heavy weight stiffener the same amount as for the hearts.

Chain effect beading to trim the shapes, it is just plastic not a metal [ I found this the cheapest at Boyes, quite expensive at Hobbycraft]
Large heart 50cms
Smaller heart 33cms

Narrow ribbon to match or contrast to fabric, to hang decoration approx. 30cms.

Fine cord or embroidery thread to match to put through centre of hearts to hold them together about 15cms to allow for threading beads, bells between shapes etc.

Beads enough to place above, middle and below for added decoration and to finish it off. You can vary the shapes and sizes but don’t have them too large.

Sewing  thread to match fabric.

Sewing needles, including one with a large enough eye you can thread cord or wool through your beads, scissors for cutting out fabric and thread, pins and tacking thread a contrast to your main fabric colour.


Wednesday 23 September 2020

Japanese patchwork first of two stitch clubs by Kate Steane 19th September 2020

 Numbers were kept at six to try and limit virus exposure; we had a table each in the large Heighington Thomas Garrett hall. The rooms committee had provided sprays and paper towels for us to wipe surfaces and handles before and after the group activity. It felt like a safe way of managing. 

Ann

Judith

Monika

Joan - pin and tack

mass production


how they fit together (top two tacked and bottom one finished)


Friday 11 September 2020

Julie's work during the summer 2020

 I have been making face coverings to keep busy etc. Then the husband suggested I marble some fabric for face coverings.   

I also took up a millinary challenge.   Then realised I had my dates mixed up.  One element had to be recycled.   So whilst sitting in a caravan at chapel st Leonard's with no plans on cooking food etc.  I decided to make flowers from unused dog poo bags.  Amazingly we don't own a dog just borrow one every so often.  But I find they are a useful size for bin bags when there.  And we had 4 different colours.

The use of sinamay was interesting.  

The facebook page for the lady who did them was inspiring creative millinary group.  It might be worth a think for a stitch club sometime.